Users with the appropriate license type and Profile permissions are able to access Discover Pro and use all of the Discover Pro capabilities. Click here to understand more about the different types of Discover tools and the different access rights.
Launching Discover Pro
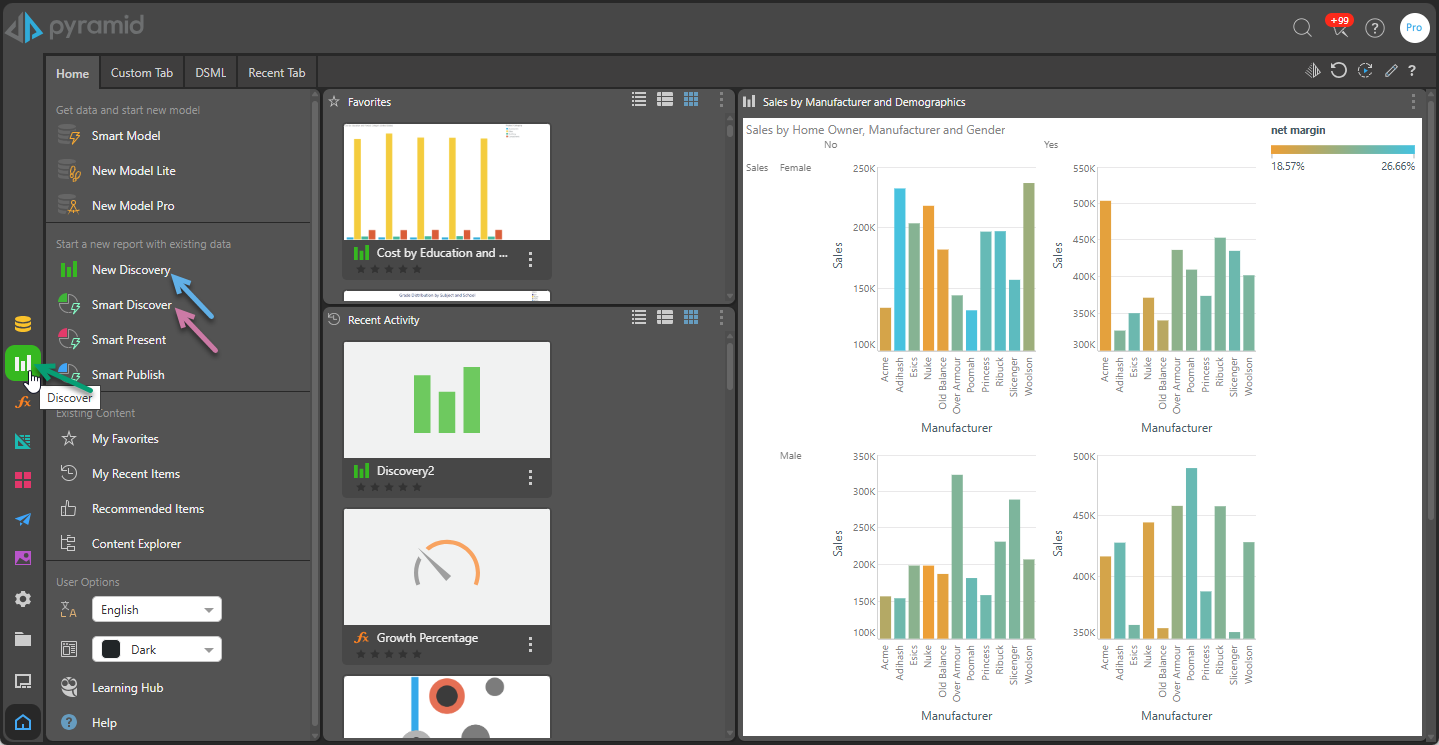
To launch Discover, click one of the Discover access points from the home page. If the profile you're assigned to has been given standard Discover access (instead of "Lite" access), this button will launch the Discover Pro app:
Creating a New Discovery
All the following options open the New Discover panel, where you will select the data model you want to analyze.
User Hub
From the Hub, you can create a new discovery by selecting New Discovery (blue arrow above) or Discover in the App Toolbox (green arrow). Alternatively, you can click Smart Discover (purple arrow above).
App Tabs
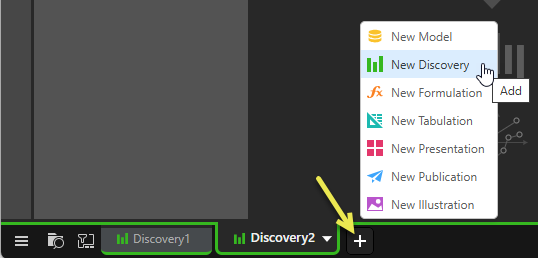
You can open a new discovery from within a module by opening the Add menu from the App Tabs:
Content Explorer
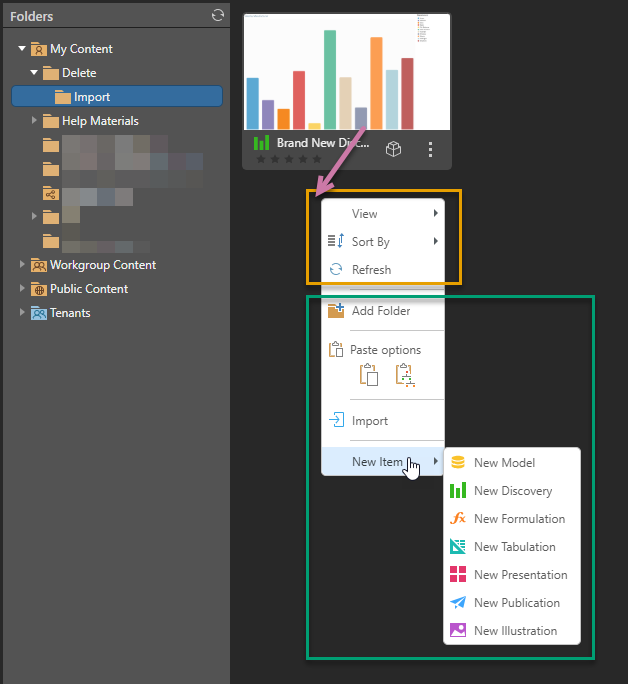
You can also create a New Discovery by right-clicking the background in the Content Explorer and choosing New Item > New Discovery from the context menu. You will then be prompted to provide a name for your new discovery before you can begin the New Discovery process:
Opening a Data Model
The first thing you need to do when creating your new discovery is to open the data model that you want to analyze. You do this by making the relevant selections from the New Discover page:
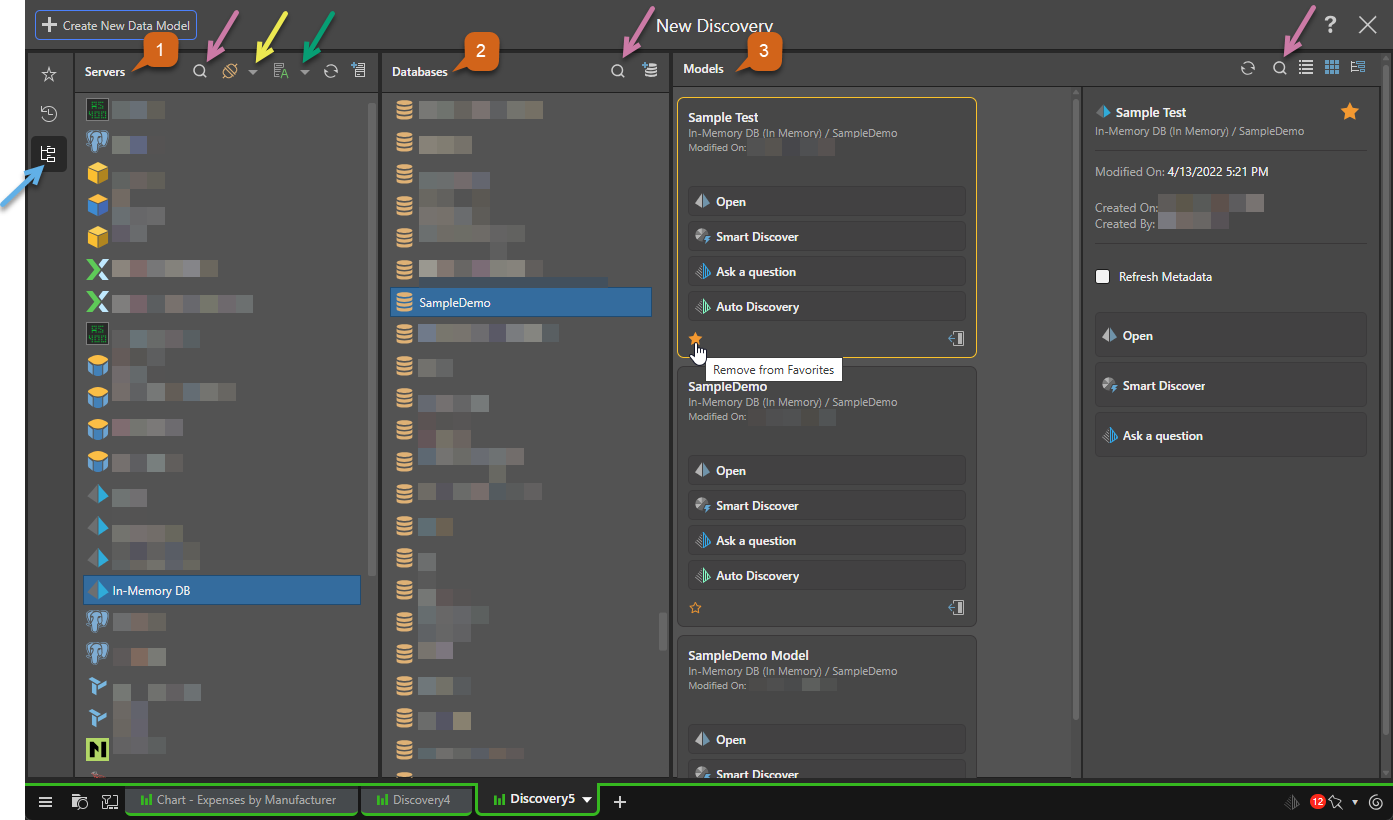
- Select Explorer (blue arrow above) in the toolbar.
- In the Servers column, find and select the server:
- Use Search (purple arrow, above) to filter servers by name.
- Use the Type dropdown list (yellow arrow) to filter the server list by type.
- Use the Sort dropdown list (green arrow) to arrange the servers by name, type, or to arrange the list by folder. The folder name is created when the data source is created.
- In the Databases column, select the required database within the given server:
- Use Search to filter databases by name.
- In the Models column, select the data model that you want to query:
- Click Refresh to refresh the list of data models.
- Use Search to filter data models by name.
- Use the buttons to view the data models in a List view, Tile view, or Tree View.
- Open the data model.
Tip: You could, alternatively, use the Favorites or Recents options if your Model is marked as a favorite or has been used recently.
Note: The filter and sort selections are saved within the session, so any subsequent visual will default to your sort and filter selections.
Tip: Hover your cursor over the server to see the server name, type, and description as a tooltip.
Adding new Servers and Databases
Depending on your access rights and selected server type, you may be able to use Quick Model to create a new server or database on the fly:

- In the Servers column, click Add New Server (orange arrow above) to create a new server.
- In the Databases column, click Add New Database (blue arrow) to add a new database to your selected server.
- Click here for more information about Quick Modeling
Note: Apart from entering Discover Pro, you can also use this entry point to launch Smart Discover or create a visual by running a Natural Language Query ("Ask a Question") or Auto Discovery.
Once you have selected your data model, you will be presented with the data model in the Discover Pro interface shown below, and you can begin querying the model:
![]()
Notes:
- You can build your visualization by dragging and dropping your hierarchies from the Dimensions panel (blue arrow above) onto the canvas (yellow arrow), and then adding other Hierarchies and Measures (green arrow) as needed. For more information and alternatives, see Building Visualizations in Discover Pro.
- You can also type your question directly into the search bar in the middle of the page; opening the Chatbot and using AI to build your visual. For more information, see Type your question.
Model Variations
There are slight variations here depending on the type of model technology:
- Pyramid (SQL) Models: Connect to a SQL server and open either an existing data model or create a new one using Quick Model.
- MS OLAP and Tabular Models: Connect to an OLAP or Tabular model to query a data model defined in the cube.
- SAP Models: Open SAP HANA and SAP BW models.